Tuesday 7 May 2013

The D/d Ratio ---The D/d Ratio is the ratio of the diameter around which the sling is bent divided by the body diameter of the sling.

The D/d Ratio is the ratio of the diameter around which the sling is bent divided by the body diameter of the sling.


Example: A 1/2" diameter wire rope is bent around a 10" diameter pipe; the D/d Ratio is 10" divided by 1/2" = D/d Ratio of 20:1

This ratio has an effect on the rated capacity of slings.


When a wire rope is bent around any sheave or other object there is a loss of strength due to this bending action. As the D/d ratio becomes smaller this loss of strength becomes greater and the rope becomes less efficient. This curve relates the efficiency of a rope diameter to different D/d ratios. This curve is based on static loads and applies to 6-strand class 6x19 and 6x37 wire rope.
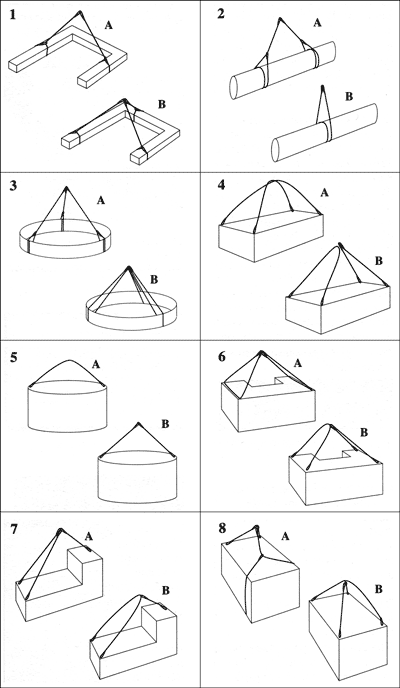
   

Eye & Eye Slings
The LOOP of an eye & eye sling has nearly DOUBLE the strength of it's body. For this reason the D/d ratio in the LOOP is just half as critical as opposed to when the sling is used in BASKET hitch.

In most cases the shackle or hook over which the sling is placed will have a sufficient D/d ratio. On the other hand, do not place too LARGE an object into the sling eye as this will result in splitting forces affecting the sling splice and sling safety.

The object (a shackle, a crane hook, a steel bar,....) you place into the sling eye must not be larger than 1/2 of the sling eye length.

When a sling is used in a BASKET- or CHOKER HITCH with D/d ratios smaller than listed in the capacity tables, the rated capacities (or WLL's) must be decreased.

For example: The BASKET and CHOKER hitch capacities listed (in all Standards and Regulations) for 6-strand ropes are based on a minimum D/d ratio of 25:1

An object you place into a 1" diameter 6-strand wire rope sling using a basket- or choker hitch must have a minimum diameter of 25". If the object is smaller than the listed 25:1 D/d ratio the capacity (or WLL) must be decreased. Table A) illustrates the percentage of decrease to be expected.

Note: The minimum D/d ratio for GATOR-FLEX® and for TRI-FLEX® slings are just 5:1. If you need to lift small objects and don't want your sling to kink or bend permanently use these types.


Eye length must NOT be smaller than twice the object (e.g. a hook) diameter. If the shackle body has AT LEAST the same diameter as the sling (D/d 1:1) the capacity need not to be adjusted If the object lifted with a 6-strand wire rope sling in a basket hitch is at least 25 x larger than the sling diameter (D/d 25:1) the basket capacity need not to be adjusted. If the shackle or object has 2 times the diameter of a 6-strand wire rope sling (D/d 2:1) the basket sling capacity must be reduced by 40% It is better to use a larger shackle or a Wide Body shackle type. If the shackle or object has at least 5x the sling diameter (D/d 5:1) the basket sling capacity must still be reduced by about 25%.


Crosby® Wide Body shackles are available in capacities ranging from 75 tons to 1000 tons. Standard shackles have round stock bodies and come in capacities ranging from 1/3 tons to 400 tons Load Hooks must have sufficient thickness to ensure proper sling D/d ratio, particularly when using slings in an inverted basket hitch; that is the sling BODY is placed into the hook and the sling EYES are facing downward 
   
   
Endless Slings
Endless (or Grommet) slings DO NOT HAVE A LOOP which has double the strength of the sling body. Prior to EVERY lift YOU, the user, has to determine if the D/d ratio is equal or higher than the ones listed in the capacity tables.
For endless 6-strand and Gator-Flex endless type wire rope slings the rated capacities have already been adjusted to be used at a D/d Ratio of 5:1.
See the WLL Tables for details.


Use large enough hooks AND large diameter shackles to avoid crushing and kinking of the sling. If possible use Wide-Body shackles. They increase the D/d ratio and you gain sling strength. Proper D/d ratio for the sling capacity. If the sling is too short you may have to adjust the capacity because of the sling angle. Small diameter shackles reduce the sling strength and, most likely, that small diameter shackle also has insufficient capacity for that job.
Shackle or not, objects to be lifted and all hook up points MUST at least ensure a D/d Ratio of 5:1.

Saturday 4 May 2013

The Fire Triangle

The Fire Triangle

In order to understand how fire extinguishers work, you first need to know a little bit about fire.

Four things must be present at the same time in order to produce fire:
bullet2.gif (950 bytes)Enough oxygen to sustain combustion,
bullet2.gif (950 bytes)Enough heat to raise the material to its ignition temperature,
bullet2.gif (950 bytes)Some sort of fuel or combustible material, and
bullet2.gif (950 bytes)The chemical, exothermic reaction that is fire.
Take a look at the following diagram, called the "Fire Triangle"

Fire Triangle 

Oxygen, heat, and fuel are frequently referred to as the "fire triangle." Add in the fourth element, the chemical reaction, and you actually have a fire "tetrahedron." The important thing to remember is: take any of these four things away, and you will not have a fire or the fire will be extinguished.
Essentially, fire extinguishers put out fire by taking away one or more elements of the fire triangle/tetrahedron.
Fire safety, at its most basic, is based upon the principle of keeping fuel sources and ignition sources separate.

Fire extinguisher iinspect & maintenance

Inspect fire extinguishers at least once a month (more often in severe environments).
Fire extinguisher maintenance is important for everyone’s safety.

You must ensure that:
  • The extinguisher is not blocked by equipment, coats or other objects that could interfere with access in an emergency.
  • The pressure is at the recommended level. On extinguishers equipped with a gauge (such as that shown on the right), the needle should be in the green zone - not too high and not too low.
  • The nozzle or other parts are not hindered in any way.
  • The pin and tamper seal (if it has one) are intact.
  • There are no dents, leaks, rust, chemical deposits and/or other signs of abuse/wear. Wipe off any corrosive chemicals, oil, gunk etc. that may have deposited on the extinguisher.
Some manufacturers recommend shaking your dry chemical extinguishers once a month to prevent the powder from settling/packing.
Fire extinguishers should be pressure tested (a process called hydrostatic testing) after a number of years to ensure that the cylinder is safe to use. Consult your owner's manual, extinguisher label or the manufacturer to see when yours may need such testing.
If the extinguisher is damaged or needs recharging, replace it immediately!

IMPORTANT: Recharge all extinguishers immediately after use regardless of how much they were used.

What is the difference between a fire extinguisher inspection and fire extinguisher maintenance?

Fire ExtinguisherINSPECTION
An inspection is a “quick check” to give reasonable assurance that a fire extinguisher is available, fully charged and operable. The value of an inspection lies in the frequency, regularity, and thoroughness with which it is conducted. The frequency will vary from hourly to monthly, based on the needs of the situation. Inspections should always be conducted when extinguishers are initially placed in service and thereafter at approximately 30-day intervals. 


MAINTENANCE
Fire extinguishers should be maintained at regular intervals (at least once a year), or when specifically indicated by an inspection. Maintenance is a “thorough check” of the extinguisher. It is intended to give maximum assurance that an extinguisher will operate effectively and safely. It includes a thorough examination and any necessary repair, recharging or replacement. It will normally reveal the need for hydrostatic testing of an extinguisher.

Rigging Jobs

Proper Rigging Safety Techniques

Proper Rigging Safety Techniques...


There are significant safety issues to be considered, both for the operators of the diverse "lifting" devices, and for workers in proximity to them. To a crane operator, few experiences may be as frightening as when a crane becomes unbalanced while a load is being lifted or when the crane collapses under the weight of an excessive load.
  • Check limit switches before rigging the load
  • Make sure the load does not exceed rated capacity.
  • Know the center of gravity of the load.
  • Attach load above the center of gravity for stability.
  • Select hitch that will control the load.
  • Know the rated capacities of rigging and slinging
  • Inspect all rigging before use
  • Protect the sling from sharp corners.
  • Allow for increased tension due to sling angle.
  • Equalize loading on multiple leg slings
  • Allow for load reductions when using choker hitches
  • Attach tag line prior to lift.
  • Keep personnel clear of lift area.
  • Wear hard hats when making overhead lifts.
  • Lift load a few inches and verify rigging.
  • Check for any loose items.
  • Know limitations of hoisting device.
  • Start and stop SLOWLY! Watch for obstructions (not only hook and load but outboard end of the bridge).
  • Check pathway is clear before making a lift (use a spotter for blind spots).
  • Verify hook completely closes.
  • Use appropriate hand signals.
  • Maintain load control at all times.
  • Report suspected drum wrappings immediately (if drum has fewer 2.5 wraps remaining).
  • Never leave load unattended.
Hoisting and Rigging Safety
Selection of the sling is only the first step in the rigging process. Hoists are often used when materials are too heavy or bulky to be safely moved manually. Because hoists rely upon slings to hold their suspended loads, slings are the most commonly used materials-handling apparatus. In part because of the complex nature of the seemingly simple task of lifting an object, an effective program is necessary to lift and move heavy loads safely.
Workers involved in hoisting and rigging operations should receive training in the following:
  • Sling and hitch types
  • Sling capacity determination
  • Equipment inspection, care, and maintenance
  • Load weight and center of gravity determination
  • Safe lifting techniques
    The crane regulations cover a number of areas, including:
  • Ground conditions.
  • Assembly and dis-assembly.
  • Work around power lines
  • And inspections.
They also address:
  • Signaling.

  • Fall protection.
  • Work area control.
  • Operator certification.
  • Qualifications for "signal persons" and maintenance personnel.
  • Training.
While you should be familiar with all of the provisions of the crane regulations that affect you and the people that you work with, some of the recent changes in the regulations are particularly notable.

Before a crane is positioned or assembled, it must be verified that the "ground conditions" are firm, drained and graded so that the crane can set up safely.

Crane assembly, disassembly and set-up must be overseen by personnel who are "competent" and "qualified". There are new restrictions as to how far a crane must be from power lines when it is being assembled, operating or traveling.
Generally it must be at least 20 feet away at all times. But this can vary depending on the amount of current going through the lines). By November 10, 2014 all crane operators must be "certified" by either:
  • An accredited testing organization.
  • A licensed government agency.
  • Or a qualified employer program.
"Signal persons" must be "qualified" based on the criteria OSHA has specified in the regulation, by either:
  • A "third party qualified evaluator".
  • Or their employer’s own "qualified evaluator".


Pythagoras Formulas

Pythagoras Formulas

Formula: Theorem of Pythagoras

Theorem of Pythagoras: a² + b² = c²
c² - b² = a²
c² - a² = b²
c = √(a² + b²)
a = √(c² - b²)
b = √(c² - a²)
Hypotenuse sector p: p = ( a² ) / c
Hypotenuse sector q: q = ( b² ) / c
Height h: h = √(p * q )
Perimeter: a + b + c
Surface area: ( a * b ) / 2
Angles: α = arccos( (b² + c² - a²) / 2bc )
β = arccos( (a² + c² - b²) / 2ac )
γ = 90 °
α + β = 90 °
Hypotenuse: c
Catheti (legs): a,b

A 500 tonne Liebherr LTM1500 collapsed

A 500 tonne Liebherr LTM1500 all Terrain crane overturned, a 35-year-old crane operator died after the crane in which he was working collapsed.


The machine was short rigged and only had one section extended, in fact it appeared to have been setting up when it went over.


The boom came down across the road striking an overpass.

Friday 3 May 2013

PROCEDURES AND PRECAUTIONS FOR LIFTING OPERATIONS


When the signalman desires to give the operator any instructions other than those provided by the established  signal  system,  the  operator  should  be instructed to stop all motion FIRST.


Hand signals can be used effectively when the distance between the operator and the signalman is not great,  but  two-way  radios  should  be  used  when  the distance  or  atmospheric  conditions  prevent  clear visibility. Adequate   lighting   and   signalling arrangements  must  be  available  during  night  work,  and the equipment must not be operated when either is inadequate.

PROCEDURES AND PRECAUTIONS FOR LIFTING OPERATIONS


The  most  important  rigging  precaution  is  to determine the weight of all loads before attempting to lift them, to make ample allowances for unknown factors, and to determine the available capacity of the equipment  being  used.  In cases where the assessment of load weight is difficult, safe load indicators or weighing devices should be fitted. This chapter also includes a section dealing with the estimation of load weights.

It is equally important to rig the load so that it is stable. Unless the center of gravity of the load is below the hook, the load will shift.

The  safety  of  personnel  involved  in  rigging  and hoisting operations largely depends upon care and common  sense.  Remember  these  safe  practices.

1. Know the safe working load of the equipment and tackle being used. Never exceed this limit.
2. Determine the load weight before rigging it.
3. Examine all hardware, equipment, tackle, and slings   before   using   them   and  survey   defective components.  Discarded  equipment  may  be  used  by someone not aware of the hazards or defects.
4. Never can-y out any rigging or hoisting operation when the weather conditions are such that hazards to personnel, property, or the public are created. You must carefully examine the size and shape of the loads being lifted to determine if a hazard exists during high wind speeds.  Avoid  handling  loads  that  have  large  wind- catching  surfaces  that  could  cause  loss  of  control  of  the load during high or gusty winds.  The wind can critically affect  the  loading  and  load-landing  operation  and  the safety of the personnel involved (fig.). 


Saturday 20 April 2013

Personal Protective Equipment
PPE

 
Personal protective equipment (PPE)
 refers to protective clothing, helmets, goggles, or other garments or equipment designed to protect the wearer's body from injury. The hazards addressed by protective equipment include physical, electrical, heat, chemicals, biohazards, and airborne particulate matter. Protective equipment may be worn for job-related occupational safety and health purposes, as well as for sports and other recreational activities. "Protective clothing" is applied to traditional categories of clothing, and "protective gear" applies to items such as pads, guards, shields, or masks, and others.

The purpose of personal protective equipment is to reduce employee exposure to hazards when engineering and administrative controls are not feasible or effective to reduce these risks to acceptable levels. PPE is needed when there are hazards present. PPE has the serious limitation that it does not eliminate the hazard atsource and may result in employees being exposed to the hazard if the equipment fails.

Any item of PPE imposes a barrier between the wearer/user and the working environment. This can create additional strains on the wearer; impair their ability to carry out their work and create significant levels of discomfort. Any of these can discourage wearers from using PPE correctly, therefore placing them at risk of injury, ill-health or, under extreme circumstances, death. Good ergonomic design can help to minimise these barriers and can therefore help to ensure safe and healthy working conditions through the correct use of PPE.

Practices of occupational safety and health can use hazard controls and interventions to mitigate workplace hazards, which pose a threat to the safety and quality of life of workers. The hierarchy of hazard control hierarchy of control provides a policy framework which ranks the types of hazard controls in terms of absolute risk reduction. At the top of the hierarchy are elimination and substitution, which remove the hazard entirely or replace the hazard with a safer alternative. If elimination or substitution measures cannot apply, engineering controls and administrative controls, which seek to design safer mechanisms and coach safer human behavior, are implemented. Personal protective equipment ranks last on the hierarchy of controls, as the workers are regularly exposed to the hazard, with a barrier of protection. The hierarchy of controls is important in acknowledging that while personal protective equipment has tremedous utility, it is not the desired mechanism of control in terms of worker safety.


Fatal Lifting Accident

OGP Safety Alert

FATAL LIFTING INCIDENT

Country: VIETNAM – Asia/Australasia

Location: OFFSHORE : Mobile Drilling Unit

Incident Date: 3 November 2010

Type of Activity: Lifting, Crane, Rigging, Deck operations

Type of Injury: Struck by

Function: Drilling

A Service Company Supervisor was fatally injured when a lifting operation on an offshore drilling rig snagged and then lost control. Originally intended to be present as an observer, the Injured Person (IP) entered the hazard zone when a roustabout handling a tag line queried the rigging arrangement with him. During this brief distraction, the roustabout released tension on the tag line and one leg of the sling caught on an overhead obstruction (a stairwell platform). When the sling became free the load swung towards the IP and his head was caught between the load and a container.
 Safety Safetyalerts Alert Images 230 S230 Img1
What Went Wrong?:

Human Factors:
- The roustabout did not address the lift supervisor first and the lift was not stopped properly
- The IP entered the hazard zone without permission from the lift supervisor
Inadequate planning and organisation of the work:
- An adequate and effective Job Safety Analysis (JSA), either written or verbal, was not conducted beforehand; the risks, precautions, lift plan, rigging arrangements, roles and responsibilities and communication were not discussed, consequently:
  • The rigging arrangements were not discussed leading to confusion over how the load was rigged and the roustabout’s distraction from the job
  • There was a lack of awareness of the dangers of the lifting environment
  • People did not know the arrangements to stop the job. The IP got drawn into the lift, although his role was to observe from a safe place
Failure to follow known procedures:
- There was casual compliance with the rig’s processes for the control of work which, if followed more robustly, would have led to better planning and control over the operation.
Corrective Actions and Recommendations:
Plan and Organise Work:

  • Only competent and authorised personnel should be directly involved in any work
  • Rigging and lifting arrangements should be discussed and agreed prior to commencing a lift
  • All parties shall participate in the JSA/JRA process, including those with a ‘passive’ role
  • Prompt cards should be used to help personnel conduct high quality JSA conversations
  • Roles and responsibilities for any work shall be clearly defined and agreed, including a clear definition of how communication will be conducted (e.g. directly to the lift supervisor)
  • Clear and unambiguous “stop the job” signals or commands will be agreed
  • No activity should start until all involved confirm they believe it is safe to do so
  • Hazard zones around worksites should be clearly identified and no unauthorized people should be able to enter during activities
  • Plan workload and resources – being undermanned or in a rush encourages shortcuts
Plan well for new contracts:
  • Ensure that minimum competence criteria is clearly defined in the contract and is met before acceptance
  • Ensure that the minimum crew/manning and supervision requirements are considered and met before the contract commences
  • Evaluate key risk areas by assessing the quality and effectiveness of standards, procedures and practices for:
- Safe Control of Work (permit to work, work instructions, JSA/JRA/Risk assessment, etc.)
- Lifting and rigging
- Competence Assurance
- Observational safety programmes
- and any other safety critical activities and risks as defined by your own risk assessment of the activities to be performed
  • In circumstances where it has not been practicable to see these areas in action before acceptance, audit them as soon as the activities start during the contract.
  • Engage subcontractors and third parties early in the planning and risk assessment process, to understand their needs, standards and best practices, and to confirm roles and responsibilities
  • Plan and resource an audit, assurance and supervision programme, and prioritise on the biggest risks
  • Thoroughly check the effectiveness of controls and practices on site and compliance with procedures. Tell management how it really is.


Chain Sling Inspection

Inspection

If any of the identification items are missing or any of the listed damage criteria are met the sling must be destroyed

  1. Identification
    1. The tag identifies size, reach, working load limit (WLL),
    2. serial number, manufacturer's name or symbol, and
    3. sling type (number of legs).


  1. Damage

Clean chain and hang vertically for inspection
    1. Measure reach accurately (bearing point of master ring to bearing point of hook). Check this length against the reach shown on tag. If present length is greater than that shown on tag, there is a possibility that the sling has been subjected to overloading or excessive wear.


    2. Make a link-by-link inspection of the chain slings for:
      1. Excessive wear - If the wear on any portion of any link exceeds the allowable wear of a link (Check with the chain manufacturer for wear specifications), immediately remove from service.
      2. Twisted, bent, gouged, nicked, worn, or elongated links.
      3. Cracks in the weld area of any portion of the link. Transverse markings are the most dangerous.
      4. Severe corrosion.

CracksDamaged Chain Sling
ElongationStretched Chain Sling
DeformationTwisted or Bent Chain Slings

    1. Check Hooks links for :
      1. Deformation . Any bending or twisting exceeding 10 degrees from the plane of the unbent hook, unless otherwise directed by the hook manufacturer.
      2. Throat Opening . Any distortion causing an increase in throat opening exceeding 15 percent or as otherwise directed by the hook manufacturer.
      3. Wear . Any wear exceeding 10 percent of the original section dimension of the hook or its load pin or as otherwise directed by the hook manufacturer.
      4. Cracks . Any visible crack.

    1. Check Master Links links for :
      1. Deformation . Stretching. Measure masterlink opening on long and narrow sides and and compare to manufacturer
      2. Wear . Any wear exceeding 10 percent of the original section dimension of the hook or its load pin or as otherwise directed by the hook manufacturer.
      3. Cracks . Any visible crack.

Wednesday 17 April 2013

Line of Fire Hazard Recognition


Lifting/Hoisting
• Never walk under a suspended load.
• Communicate to other workers when entering a lifting/hoisting zone, even if for a short period.
• Balance the load prior to lifting.
• Rigging equipment shall never be loaded in excess of its maximum safe loading limit.

Line of Fire Hazard Recognition
When it comes to preventing injuries at the workplace, it is often good to start with the basic types of injuries that do occur. These can be broken down into three categories.
As you consider the possibility of workplace injures, consider the following as the main ways workers can be hurt:
  1. Caught-in
  2. Struck by
  3. Energy Released
Once you understand the above, the next step is to determine which types of activities or settings cause the majority of workplace injuries.
Line of Fire refers to those workers who put themselves in harm's way by virtue of the type of work they do. This can occur in both manufacturing and construction. Line of Fire injuries can occur in the following areas.
Target Areas:
  • Heavy Equipment
  • Machinery
  • Hand and Power Tools
  • Material handling
  • Mobile Equipment
  • Excavations
  • Unsafe Behaviors
It is important to always remember that Line of Fire hazards are one of the most deadly hazards found in Manufacturing and Construction, second only to Slip, Trips and Fall.
Each year hundreds of workers are injured by Line of Fire accidents.
Deaths from Line of Fire injuries number into the hundreds. Approximately 27% of work place deaths are related to Line of Fire accidents.
As companies consider their safety programs, the objective should be:
No one gets hurt because of a Line of Fire injury whether they are performing the task or simply in the area.
Caught-in hazards occur when a worker could be caught inside of or in between different objects.
Struck by hazards occur when a worker could be struck by an object.
Energy Released hazards occur when a worker is in the path of Released Hazardous Energy.

Crane Signals

When should the crane operator follow hand signals?

A crane operator should always move loads according to the established code of signals, and use a signaler. Hand signals are preferred and commonly used.


Who can give the hand signals? or Who can be a signaler?

  • A person qualified to give crane signals to the operator.
  • There should be only one designated signaler at a time.
  • If signalers are changing between each other, the one in charge should wear a clearly visible badge of authority.
  • A crane operator should move loads only on signals from one signaler.
  • A crane operator must obey STOP signals no matter who gives it.


What should you do when in charge of signaling?

The signaler must:
  • Be in clear view of the crane operator.
  • Have a clear view of the load and the equipment.
  • Keep persons outside the crane's operating area.
  • Never direct a load over a person.


What are examples of some common hand signals?

Hoist: With forearm vertical, forefinger pointing up, move the hand in a small horizontal circle. Lower: With an arm extended downward, forefinger pointing down, move the hand in small horizontal circles.
Multiple Trolleys: Hold up one finger for block marked "1" and two fingers for a block marked "2." Regular signals follow.
Hoist
Hoist
Lower
Lower
Multiple Trolleys
Multiple Trolleys
Bridge Travel: Arm extended forward, hand open and slightly raised, make a pushing motion in direction of travel.
Trolley Travel: Palm up, fingers closed, thumb pointing in direction of motion, jerk the hand horizontally.
Stop: Arm extended, palm down, hold the position rigidly.
Bridge Travel

Bridge Travel
Trolley Travel
Trolley Travel
Stop
Stop
Emergency Stop: Arm extended, palm down, move the hand rapidly right and left.
Magnet Is Disconnected! : Crane operator spreads both hands apart, palms up.
Dog Everything: Clasp hands in front of the body. Means PAUSE. This signal can be used on potentially risky occasions such as when it has started raining, when the load doesn't fit the space for which it was planned, or when a bystander gets too close to the action.
Emergency Stop
Emergency Stop
Magnet is Disconnected!
Dog Everything
Dog Everything


What are some common hand signals for crawler, truck and locomotive cranes?

Use Main Hoist: Tap fists on head; then use regular signals. Use Whip Line (Auxiliary Hoist): Tap elbows with one hand; then use regular signals.
Raise Boom: Arm extended, fingers closed, thumb pointing upward.
Lower Boom: Arm extended, fingers closed, thumb pointing downward.
Swing: Point with a finger in direction of swing of a boom.
Use Main Hoist
Use Main Hoist
Use Whip Line
Use Whip Line
Raise Boom;  Lower Boom; Swing
Raise Boom; Lower Boom; Swing
Raise the Boom and Lower the Load: Arm extended, fingers closed, thumb pointing upward, other arm bent slightly with forefinger pointing down and rotate hand in horizontal circles.
Lower the Boom and Raise the Load: Arm extended, fingers closed, thumb pointing downward, other arm with forearm vertical, forefinger pointing upward and rotate the hand in horizontal circles.
Move Slowly: Use one hand to give any motion signal and place the other hand motionless in front of the hand giving the motion signal. (Hoist Slowly shown as example.)
Raise the Boom and Lower the Load
Lower the Boom and Raise the Load
Move Slowly
Move Slowly
Retract Boom (Telescoping Booms): Both fists in front of body with thumbs pointing toward each other.
Extend Boom (Telescoping Booms): Both fists in front of body with thumbs pointing outward.
Retract Boom
Retract Boom
Extend Boom
Extend Boom


What are some signals for crawler cranes only?

Lock Track: this side as indicated by raised fist. Turn Travel Track: this side in direction shown by revolving fist.
Travel Both Tracks: forward or backward by revolving fists.
Lock Track - Turn Travel Track
Lock Track
Turn Travel Track
Travel Both Tracks
Travel Both Tracks